Input

book: Create a structured PDF document with headings, chapters, etc.
webpage: Specifies that the HTML sources are unstructured (plain web pages.) A page break is inserted between each file or URL in the output.
continuous: Specifies that the HTML sources are unstructured (plain web pages.) No page breaks are inserted between each file or URL in the output.
Title of the document for the front page.
Extract the first heading of the document and use it as title. If checked the title field has no effect.
The title image or HTML page. These file has to be an attachments!
Specify document version to be displayed on the title page.
Intellectual property owner of this document.
Copyright notice for this document.
Information about who and when modified the document are applied at the end.

Output

Specifies the output format.
Grayscale document  Title page
Compression :   JPEG big images 

Pagina

 
User defined page size 
Choose one of the predefined standard sizes or select user defined.
Specifies the page size using a standard name or in points (no suffix or ##x##pt), inches (##x##in), centimeters (##x##cm), or millimeters (##x##mm).
Set the target browser width in pixels (400-1200). This determines the page scaling of images.
   2-Sided   Landscape


Specifies the margin size using points (no suffix or ##x##pt), inches (##x##in), centimeters (##x##cm), or millimeters (##x##mm). Keep empty for default value.
Left
Middle
Right
Sets the page header to use on body pages.
Left
Middle
Right
Sets the page footer to use on body pages.

Indice

Sets the number of levels in the table-of-contents. Empty for unlimited levels.
   Numbered headings Check to number all of the headings in the document.
Sets the title for the table-of-contents. Empty for default title.
Left
Middle
Right
Sets the page header to use on table-of-contents pages.
Left
Middle
Right
Sets the page footer to use on table-of-contents pages.

Colors

Enter the HTML color for the body (background).
Enter the image file for the body (background). These file has to be an attachments!
Enter the HTML color for the text.
Sets the color of links.
Enables generation of links in PDF files.

Fonts

Set the default size of text.
Set the spacing between lines of text.
Choose the default typeface (font) of text.
Choose the default typeface (font) of headings.
Set the size of header and footer text.
Choose the font for header and footer text.
Change the encoding of the text in document.
Check to embed font in the output file.

PDF

Controls the initial viewing mode for the document.
Document: Displays only the docuemnt pages.
Outline: Display the table-of-contents outline as well as the document pages.
Full-screen: Displays pages on the whole screen; this mode is used primarily for presentations.
Controls the initial layout of document pages on the screen.
Single: Displays a single page at a time.
One column: Displays a single column of pages at a time.
Two column left/right: Display two columns of pages at a time; the first page is displayed in the left or right column as selected.
Choose the initial page that will be shown.

Security

Check to number all of the headings in the document.
 Versione stampabile   Modify
 Copy   Annotate
Specifies the document permissions.
Specifies the user password to restrict viewing permissions on this PDF document. Empty for no encryption.
Specifies the owner password to control who can change document permissions etc. If this field is left blank, a random 32-character password is generated so that no one can change the document.

Expert

Specify language to use for date and time format.
Shrink code blocks on page.
Show line numbers for code blocks.
Make spaces visable by dots (·) instead of white spaces.
Make line breaks visable by a extra character (¶) at the end.
Enable this feature if you searching for problems or intent to report a bug report

About

Version 2.4.2 (MoinMoin 1.9.7)


MoinMoin - Generate PDF document using HTMLDOC

This action script generate PDF documents from a Wiki site using
the HTMLDOC (http://www.htmldoc.org) software packages which has
to be preinstalled first.

Copy this script in your's MoinMoin action script plugin directory.

Thanks goes to Pascal Bauermeister who initiated the implementaion.
Lot of things changes since then but the idear using HTMLDOC is the
main concept of this implementation.

Please visit the homepage for further informations:
http://moinmo.in/ActionMarket/PdfAction

@copyright: (C) 2006 Pascal Bauermeister
@copyright: (C) 2006-2010 Raphael Bossek <raphael.bossek@solutions4linux.de>
@license: GNU GPL, see COPYING for details


Italiano English
Modifica History Actions

antennaPCB

Un metodo per produrre antenne a basso costo e a guadagno accettabile è quello di stamparle su basette di rame. Anzitutto scegliamo il modello dell'antenna (alcuni sono disponibili qui ma le istruzioni vanno tradotte dal polacco!). L'obiettivo è quello di realizzare un antenna economica con un guadagno sui 14 dbi da attaccare alla fonera. L'antenna che abbiamo scelto è questa :
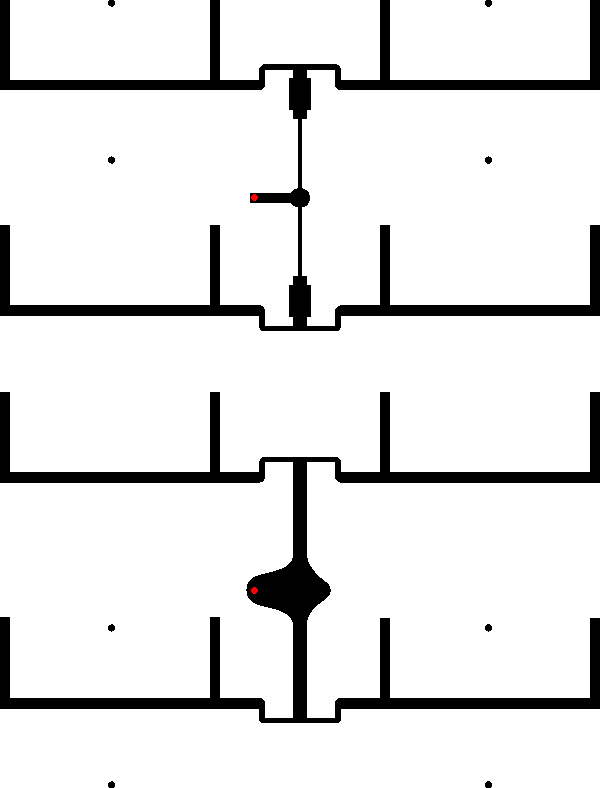
antenna pcb 14dbi

Si tratta di un array di dipoli da stampare su due lastre di rame a singola faccia. Il metodo che abbiamo usato per l'incisione è quello con i fogli Press And Peel che permettono a chiunque (abbia un ferro da stiro!) di stampare un circuito con una spesa iniziale molto ridotta. Intatti è sufficiente trovare i fogli che vendono in pacchi da 5 a circa 12 €, e l'acido che costa 3-4€.

Materiale:

materiale

quantità

costo

Basetta di rame 20X30 cm

1

5 €

Foglio press-n-peel

1

1,2 €

Cavo RF

0.5m

< 1€

Connettore R-SMA femmina

1

3.5 €

Viti o distanziatori

4

< 1 €

Totale

10 euro!

1. Stampiamo il disegno su un foglio press and peel avendo l'accortezza di 1)rispettare le dimensioni che devono essere 194 x 255 mm 2) stamparlo con stampante laser 3) flippare orizzontalmente l'immagine
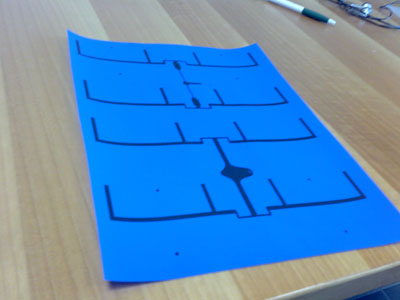
antenna pcb 14dbi

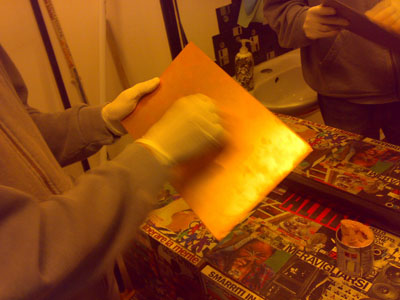
2. Puliamo la basetta di rame. Consigliamo di pulirlo con una spugna con una parte ruvida (di solito verde) e dell'alchool. pulire la basetta
3. Stirare il foglio sulla basetta. Tenendo a contatto il toner con il rame. Per esperienza è stato necessario una ventina di minuti a metà potenza del ferro da stiro. E' utile avere un pennarello speciale per ripassare le parti venute male.
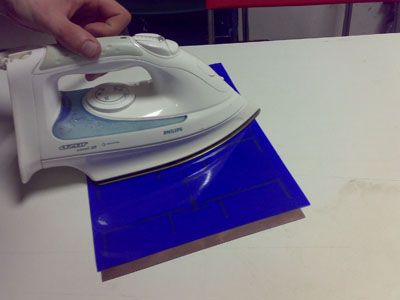
Stirare

alla fine dovremmo ottenere una cosa del genere:
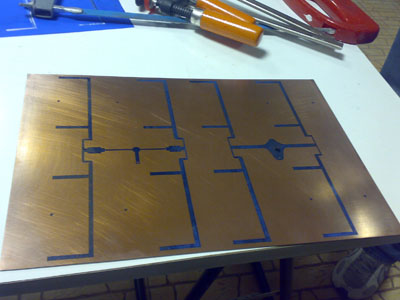
La stampa sul rame

4. Immergere nell'acido per corrodere il rame non protetto (l'acido si trova in quasi ogni negozio di elettronica e costa pochissimo!). Consiglio: mettere a faccia in giù il circuito (non come vedete nella foto!! :-) ) cosi' il rame corroso cadrà sul fondo della vaschetta.
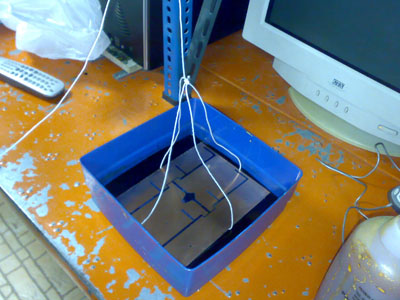
pronta

5. Creare il connettore. Prendere il cavo e metterci il connettore
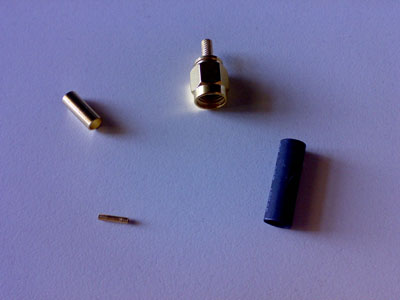
connettore R-SMA !!!

Saldare (o crimpare) la parte piccola con il probe (il filo interno). Questa è probabilmente parte più delicata. Inserirlo dentro l'involucro esterno fino a che il metallo non si veda dal buco :-) A questo punto inserire la parte metallica cilindrica sopra la garza e criparla. Ad ultimo usare la guaina termorestringente.

(descrizione da migliorare!! :D )

6. Montaggio.

Segare la basetta per ricavare le due facce Segare in due parti
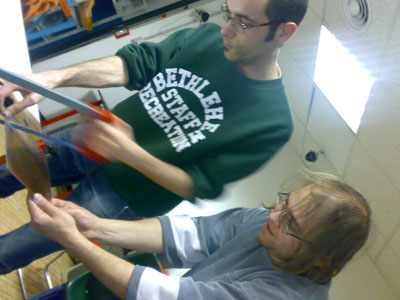
Forare con un trapano ed una punta abbastanza fina (2 - 3 mm).
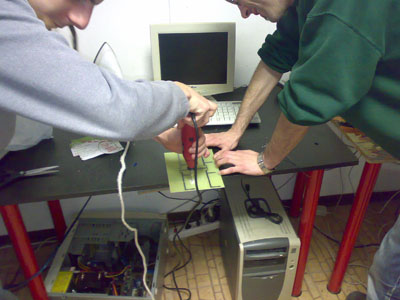
Forare

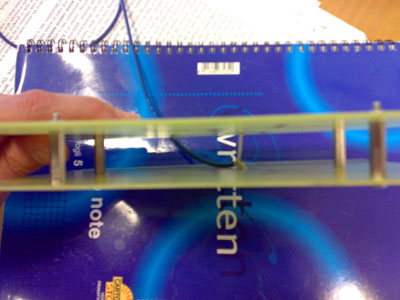
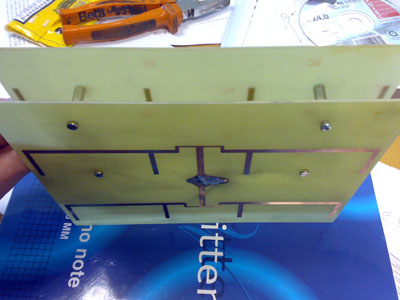
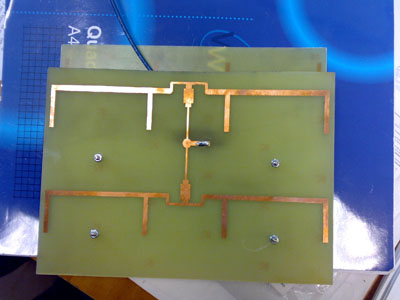
7. Montare le due faccie "tipo panino" , in modo che le piste di rame siano esterne. La distanza da tenere è di circa due centimetri. Io ho usato dei distanziatori da 2 cm. pronta Saldare all'antenna il cavo che abbiamo precedentemente attaccato al connettore. Il cavo dovrà essere spellato e fatto passare tra le due faccie.: la parte interna (probe) dovrà essere saldata sul punto rosso corrispondente con la piazzola di rame rettangolare più piccola , mentre la parte esterna dovrà essere saldata sul punto rosso corrispondente alla piazzola di rame più grossa. Per motivi estetici si puo' levare la protezione nera sui circuiti con della trielina.
8. L'antenna è pronta! Teoricamente il guadagno dovrebbe essere di 15 dbi ovvero dovremmo avere un guadagno di circa 13 db maggiore rispetto all'antenna standard in dotazione con la fonera.
pronta

pronta

[1] http://www.wifi-ita.com/index.php?option=com_content&task=view&id=84&Itemid=45